
Creating Decision Trees
Your Xpress Insight app may have been designed to allow you to create decision trees, as well as edit them.
The nodes in decision trees correspond to potential decision keys, and actions/treatments can be assigned to the leaf nodes. These features are likely to have been incorporated into your app by your app developer, so that the right options are available to you as you create and build your trees.
To create a new decision tree:
- Open the Scenario Attachments dialog - either at project or scenario level.
- Locate the attachment you intend to use as an input file and ensure it is tagged decision-tree-data.
- Select from the menu
- Give the tree a name in the New Attachment dialog, ensuring it terminates with .fsml.
The decision tree editor is launched - it contains a skeleton tree with a single Start node and an empty Treatments level.
- Populate the tree using your choice of editing operations as described in the previous section.
- Set the profile variables (described in a later section) and explore the data.
- Save and close the tree.
The figure shows a small tree under development - the variable Frequency has been chosen and an initial tree count (see later) performed:
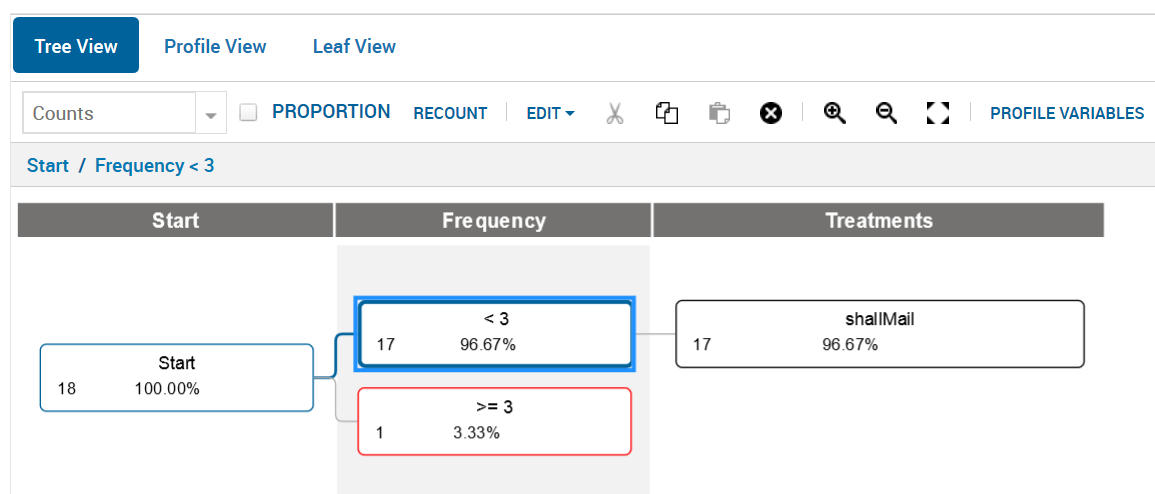
Decision Tree Under Construction