Now that we have prepared the execution request, we are ready to call Xpress Executor.
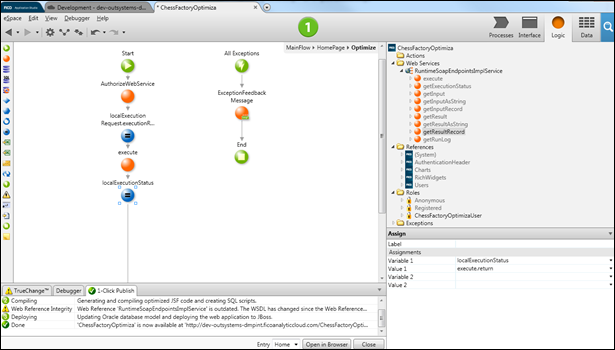
- Find the execute action within RuntimeSoapEndpointsImplService and drag this action on to the flow. Use the executionRequest variable with the executionRequest record as its 'arg0' parameter.
- The execute action will start the optimization on the server using the execution request record we previously constructed. After optimization is complete, construct the execution request record and start the execution on the server.
- Add an assignment immediately after server execution. Because the execute action will return the current execution status, add an assignment immediately after server execution to save execute.return in localExecutionStatus.
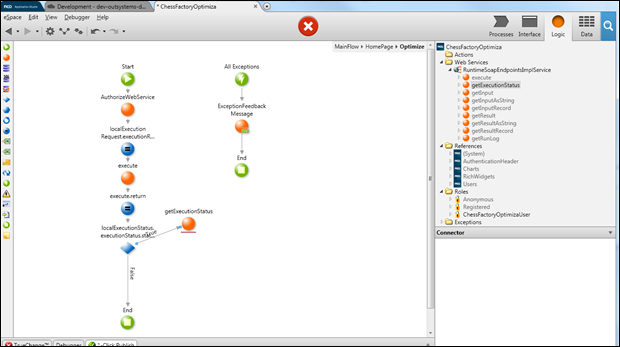
- Add an 'if' statement that tests whether localExecutionStatus.executionStatus.status="NOT_COMPLETED". If true, the execution has not completed, at which point we will try to update its status and try again. (In this example the execution will complete quickly, but if you have a larger model then you may want to delay before querying the execution status.)
- Drag the getExecutionStatus action and connect it to the 'true' branch of the condition; the argument of this action should be localExecutionStatus.executionStatus.id (the unique ID of the execution).
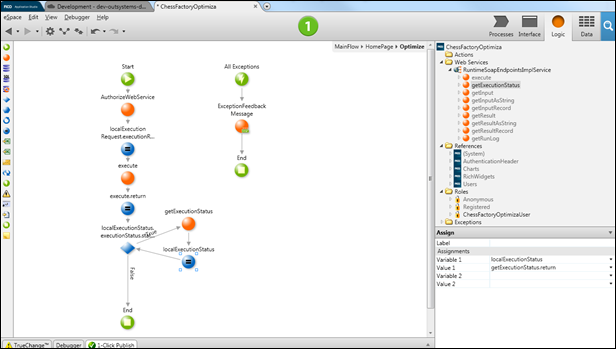
- Assign localExecutionStatus to getExecutionStatus.return and retry the condition so that the flow will only proceed down the 'false' branch of this condition when the execution status is no longer 'NOT_COMPLETED'.