
Running the Model in Xpress Workbench
- foliodata.mos - the model source file as described earlier.
- folio.dat - the separate data file containing values for the RET, RISK and NA entities, and implicitly the SHARES entity—again as described earlier.
- In the Xpress Workbench HOME page, click CREATE PROJECT, enter a value of Portfolio Optimization in the Name field in the subsequent Create Project dialog and then click SAVE.
A new tile called Portfolio Optimization appears in the Xpress Workbench HOME page.
 Note Depending upon your installation, you may see an existing project tile labeled Portfolio - An Optimization Model Example on the Xpress Workbench HOME page. This is a more advanced portfolio optimization model provided as an example, and is unrelated to the new Portfolio Optimization project just created.
 - Click on the Portfolio Optimization tile.
Xpress Workbench launches your new project in which it has created a template application structure. Examine the contents of the vertical Project tab:This arrangement of new files and folders is designed to help you start quickly with a new Xpress Insight app.
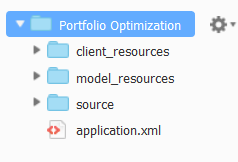
A New Xpress Workbench Project
- In the File menu, choose Upload Local Files and follow the prompts to upload your prepared files - foliodata.mos and folio.dat - to the Portfolio Optimization root folder.
The project structure now appears as:
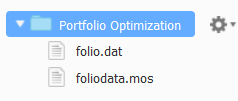
Uploaded Model Source and Data Files
- In the Run menu, choose Run foliodata.mos and wait a few moments.
The model compiles and runs, and a new file appears in the project tab, which now appears as:The new file is result.dat, the output file written by the model, originally declared as a parameter in line 8.
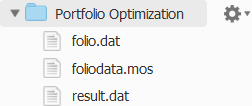
Project Contents After First Model Run
Note Depending on the settings of your Xpress Workbench environment, some other files may also appear at this stage. For the purposes of this tutorial, they can safely be ignored.
The model has been run in its native form as a Mosel model, albeit called and executed by Xpress Workbench.
© 2001-2019 Fair Isaac Corporation. All rights reserved. This documentation is the property of Fair Isaac Corporation (“FICO”). Receipt or possession of this documentation does not convey rights to disclose, reproduce, make derivative works, use, or allow others to use it except solely for internal evaluation purposes to determine whether to purchase a license to the software described in this documentation, or as otherwise set forth in a written software license agreement between you and FICO (or a FICO affiliate). Use of this documentation and the software described in it must conform strictly to the foregoing permitted uses, and no other use is permitted.