
Working with Forms
- Boolean entities map to check boxes.
- everything else maps to text fields.
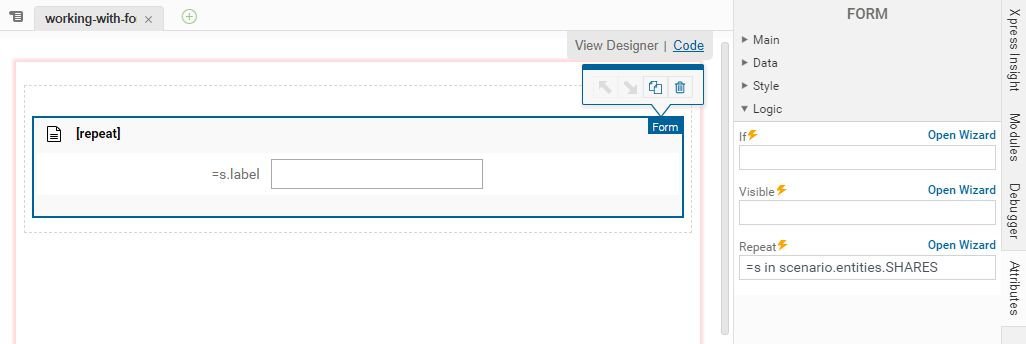
You can also generate form fields from elements in an array by looping over one or more of the index sets. The following example combines these concepts.
<vdl version="4.7">
<vdl-page>
<vdl-section>
<vdl-form vdl-repeat="=s in scenario.entities.SHARES">
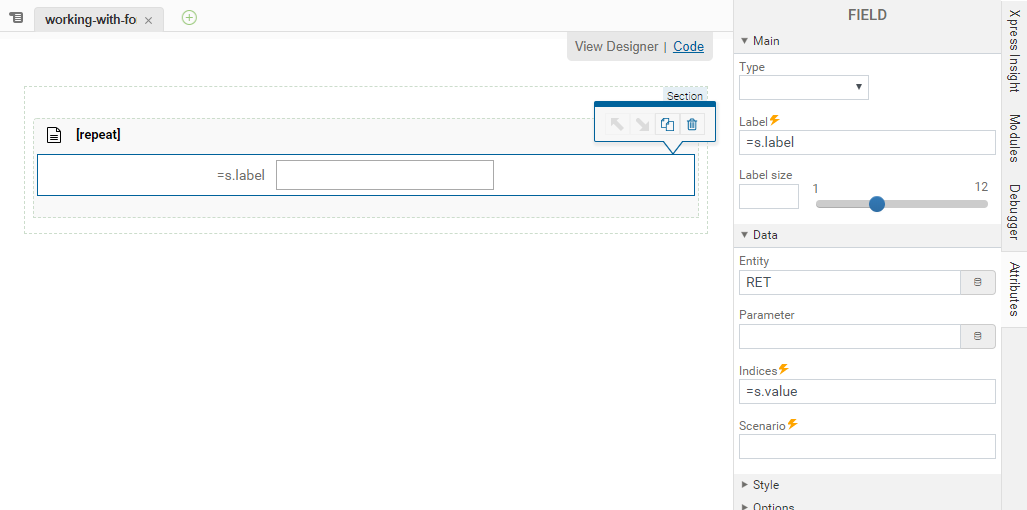
<vdl-field entity="RET" indices="=s.value" label="=s.label">
</vdl-field>
</vdl-form>
</vdl-section>
</vdl-page>
</vdl>
Note that for array entities, you must specify the indices for the array elements that will be edited by the fields.
In the previous code editor example, this is specified within the <vdl-form> element as a repeated assignment indices="=s.value".
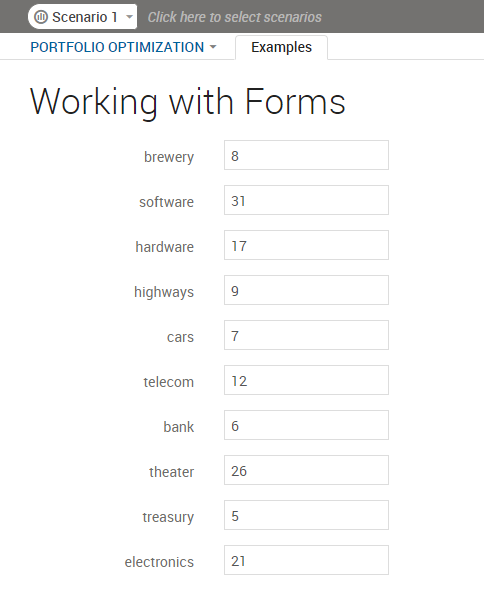
A Rendered VDL Form
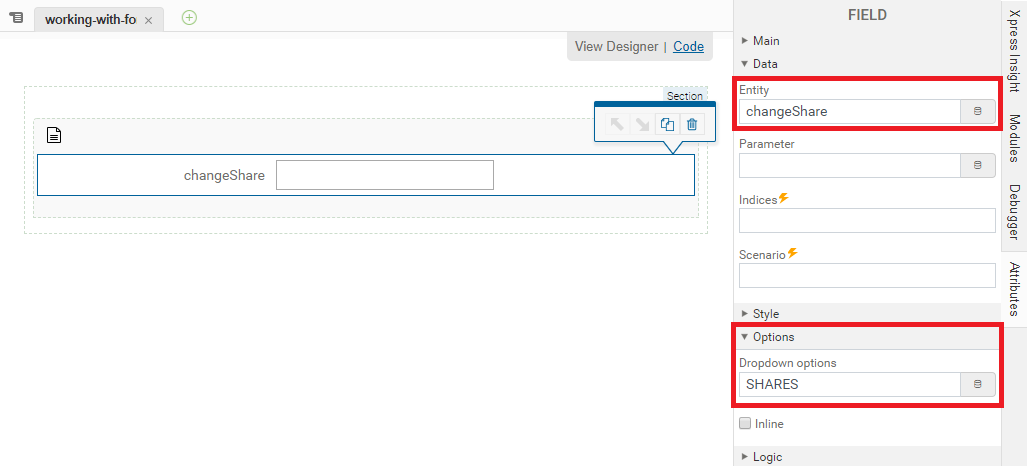
You can create a drop-down list that can be limits the selectable options to a fixed set of values by specifying a set entity from which the options are sourced.
<vdl version="4.7">
  <vdl-page>
    <vdl-section>
      <vdl-form>
        <vdl-field entity="changeShare"
                   options-set="SHARES">
        </vdl-field>
      </vdl-form>
    </vdl-section>
  </vdl-page>
</vdl>
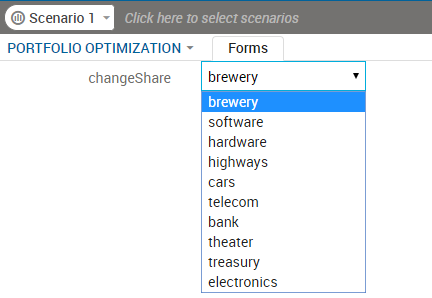
Rendered VDL Drop-down List
If the entity bound to a VDL field is a string or an array, you may wish an empty option to be included to clear the string or remove the array element. In this case, set the attribute options-include-empty="true".
Fields can also be made read–only by toggling the enabled attribute. By default, this is set to true, allowing user input. You can toggle the enabled state using an expression. In the following example, the Goal field is disabled if the IncludeTax entity is false.
<vdl-form>
    <vdl-field entity="IncludeTax"></vdl-field>
    <vdl-field entity="Goal"
               enabled="=scenario.entities.IncludeTax.value"
               options-set="Goals"
    </vdl-field>
</vdl-form>
Finally, it is also possible to specify control options as a plain JavaScript array or object. These options could be generated by a function.
<vdl version="4.7">
    <vdl-page>
        <script>
            function generateGoalOptions() {
                return {
                    1: 'Option 1',
                    2: 'Option 2'
                };
                l
            }
        </script>
        <vdl-section>
        <vdl-form>
          <vdl-field entity="Goal" options="=generateGoalOptions()">
          </vdl-field>
        </vdl-form>
    </vdl-page>
</vdl>
© 2001-2019 Fair Isaac Corporation. All rights reserved. This documentation is the property of Fair Isaac Corporation (“FICO”). Receipt or possession of this documentation does not convey rights to disclose, reproduce, make derivative works, use, or allow others to use it except solely for internal evaluation purposes to determine whether to purchase a license to the software described in this documentation, or as otherwise set forth in a written software license agreement between you and FICO (or a FICO affiliate). Use of this documentation and the software described in it must conform strictly to the foregoing permitted uses, and no other use is permitted.