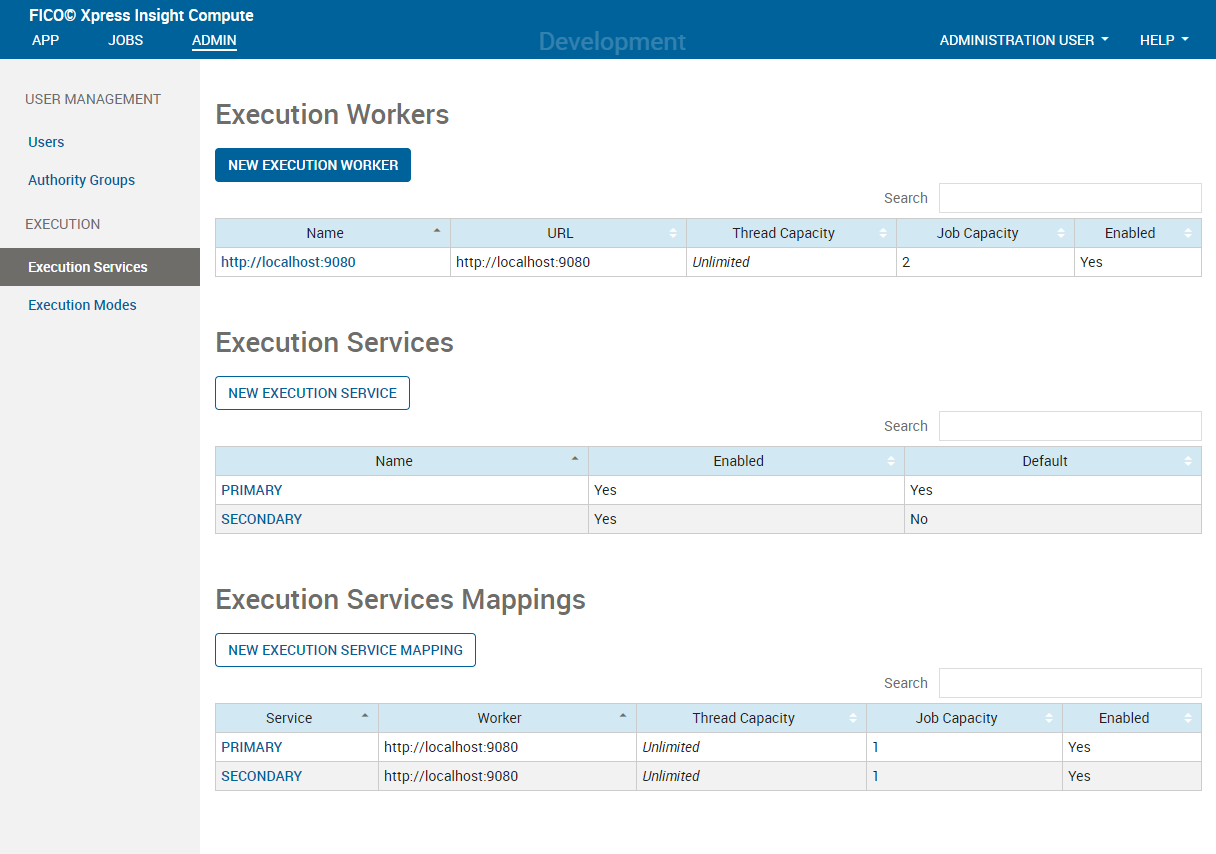
To add an execution worker:
- Click New Execution Worker in the Execution Workers pane of the Execution Services admin page.
Control switches to the New Execution Worker dialog window.
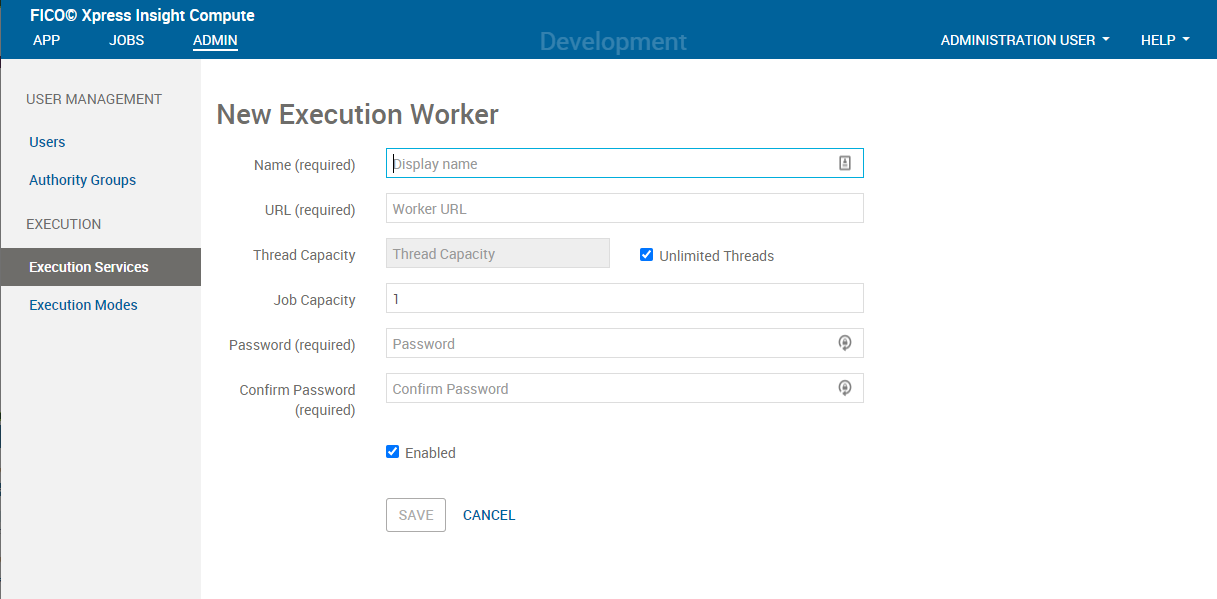
- Complete the following fields:
- Name (required): An alias for the worker to serve as a brief identifier, such as localhost.
- URL (required): URL of the worker, for example;
- http://localhost:9080
- https://192.168.3.4:9443
- https://xpress-insight-worker.company.com
- Thread capacity: The maximum number of threads available to allocate to Xpress Insight jobs.
- Unlimited Threads: Select this option to disable thread the capacity restriction and solely use the job capacity option below to limit job concurrency on this worker.
- Job capacity (required): This denotes the maximum number of jobs that the worker will be asked to execute concurrently.
- Enabled: Uncheck the Enabled checkbox if you do not want the Xpress Insight server to send jobs to this worker.
- Click SAVE when finished.
At any subsequent time, you can return to edit the worker's details by clicking on the value in the Name column of the Execution Workers section.