Initializing help system before first use

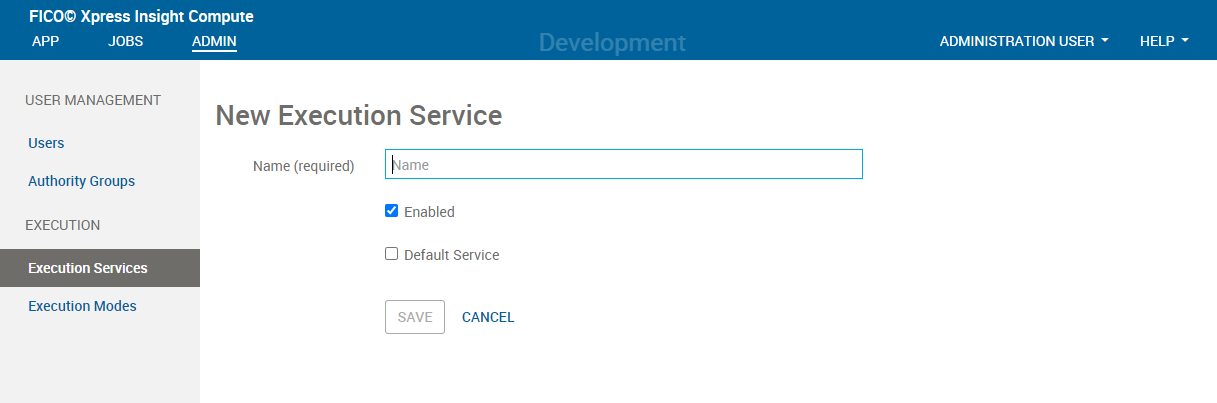
Adding and Editing Execution Services

Note Jobs submitted via the Compute App currently use the default execution service. The Xpress Insight v5 Compute Interface does not allow you to route jobs to other execution services at this time. The instructions provided in this section apply to jobs submitted through the REST API or by Xpress.

To add an execution service:

  1. Click NEW EXECUTION SERVICE in the Execution Services pane on the Execution Services admin page.

    Control switches to the New Execution Worker dialog window.

  2. Complete the following fields:
    • Name (required): An alias for the execution service that serves as a brief identifier, such as FAST_LANE.
    • Enabled: Deselect the Enabled checkbox if you do not want the new execution service to be active.
    • Default Service: Select this if you want your new execution service to be the default execution service for models that do not nominate a specific execution service.
  3. Click SAVE when finished.

    At any subsequent time, you can return to edit the execution service's details by clicking on the value in the Name column of the Execution Services section.

    Two default execution services called PRIMARY and SECONDARY are configured on initial installation. Developers might choose to route longer jobs to, say, PRIMARY and short duration jobs to SECONDARY. This is one way to improve throughput and avoid blocking.