
Adding an Execute Button
With VDL Actions, you can add a button to a view that allows a user to submit a scenario for execution with a given execution mode, optionally setting a scalar entity first. For more, see
Model Execution using VDL Actions.
By default, a button that initiates scenario execution will trigger the first scenario by default and set the execution mode to RUN.
View Designer
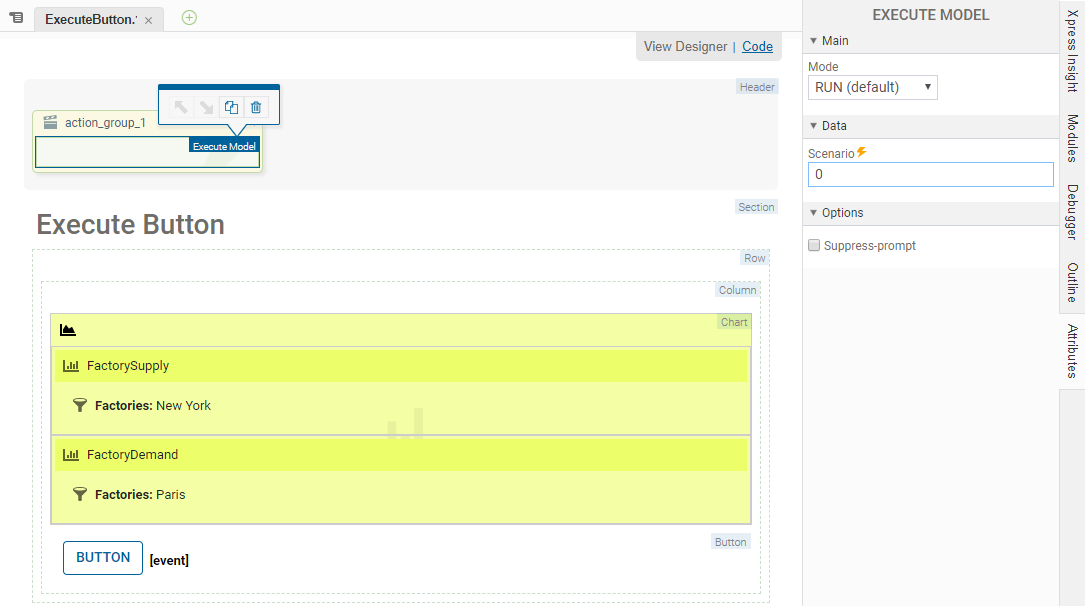
In the Palette > Actions group, click and drag an Execute Model element onto the Section.
In the
Palette >
Components group, click and drag a
Button element onto the Column. In the
Button > Attributes > Events pane, click
Add Event. Configure the Event:
- Set the Event to click.
- Set the Action Group to actions.action_group_1.
To change the scenario, select the Execute Model action and update the Data > Scenario setting:
View Designer
Adding a button in the View Designer
To change the execution mode, select the Execute Model action and update the Main > Mode setting: You can set the mode to be any custom execution mode defined in the model, or one of the standard modes(LOAD and RUN).
It is good practice to set a scalar before execution. The
value attribute accepts an expression so you can calculate the value based on the current values of other model entities.
<vdl-button vdl-event="click:actions.action_group_1" entity="LIMIT" value="=getLimit()" caption="Evaluate limited dataset">
</vdl-button>