
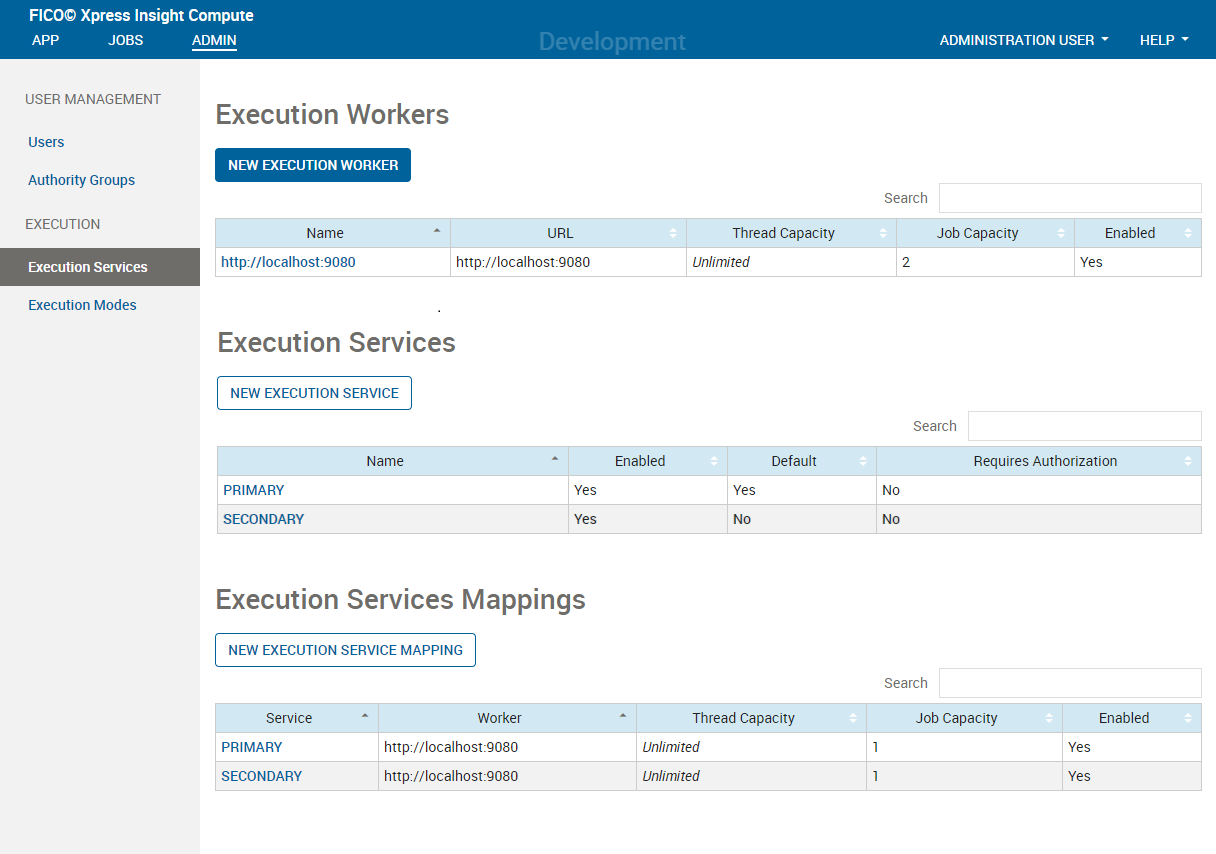
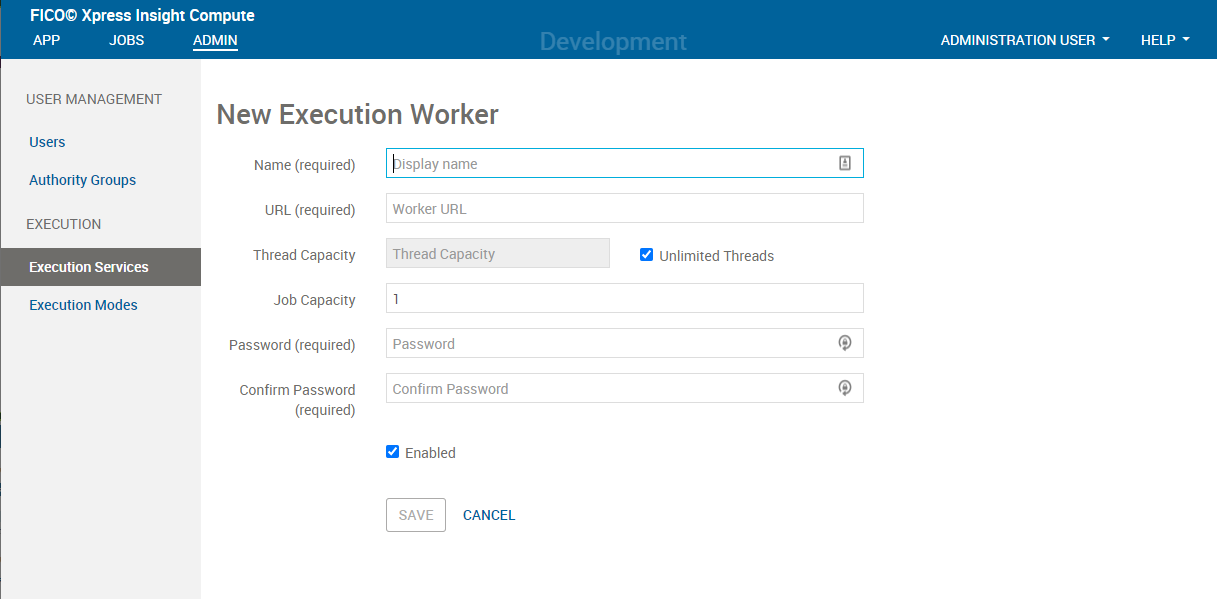
Adding and Editing Execution Workers
- Click New Execution Worker in the Execution Workers pane of the Execution Services admin page.
Control switches to the New Execution Worker dialog window.
At any subsequent time, you can return to edit the worker's details by clicking on the value in the Name column of the Execution Workers section.
© 2001-2022 Fair Isaac Corporation. All rights reserved. This documentation is the property of Fair Isaac Corporation (“FICO”). Receipt or possession of this documentation does not convey rights to disclose, reproduce, make derivative works, use, or allow others to use it except solely for internal evaluation purposes to determine whether to purchase a license to the software described in this documentation, or as otherwise set forth in a written software license agreement between you and FICO (or a FICO affiliate). Use of this documentation and the software described in it must conform strictly to the foregoing permitted uses, and no other use is permitted.