Unless otherwise specified, jobs submitted via the Compute App will use the default execution service. The Compute Interface also allows the client to specify which execution service to use. Administrators may also mark certain execution services as requiring authorization to only permits users with the correct authority group to access them. If the client tries to submit a compute job to a service they do not have permission to use, the request will be rejected.
To add an execution service:
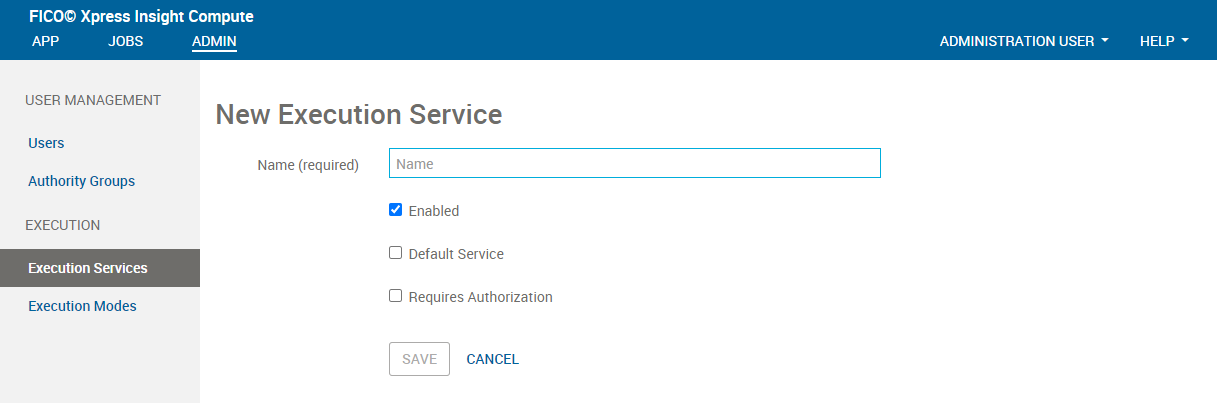
Click NEW EXECUTION SERVICE in the Execution Services pane on the Execution Services admin page.
The New Execution Worker dialog is displayed.
Complete the following fields:
Name (required): An alias for the execution service that serves as a brief identifier, such as FAST_LANE.
Enabled: Deselect the Enabled checkbox if you do not want the new execution service to be active.
Default Service: Select this if you want your new execution service to be the default execution service for models that do not nominate a specific execution service.
Requires Authorization: Select this option to restrict the users who can access this Execution Service. Access is granted via the Execution Service Authorities panel on the Authority Groups page. For more, see Managing Authority Groups.
Click SAVE when finished.
At any time, you can return to edit the execution service's details by clicking the link in the Name column of the Execution Services section.
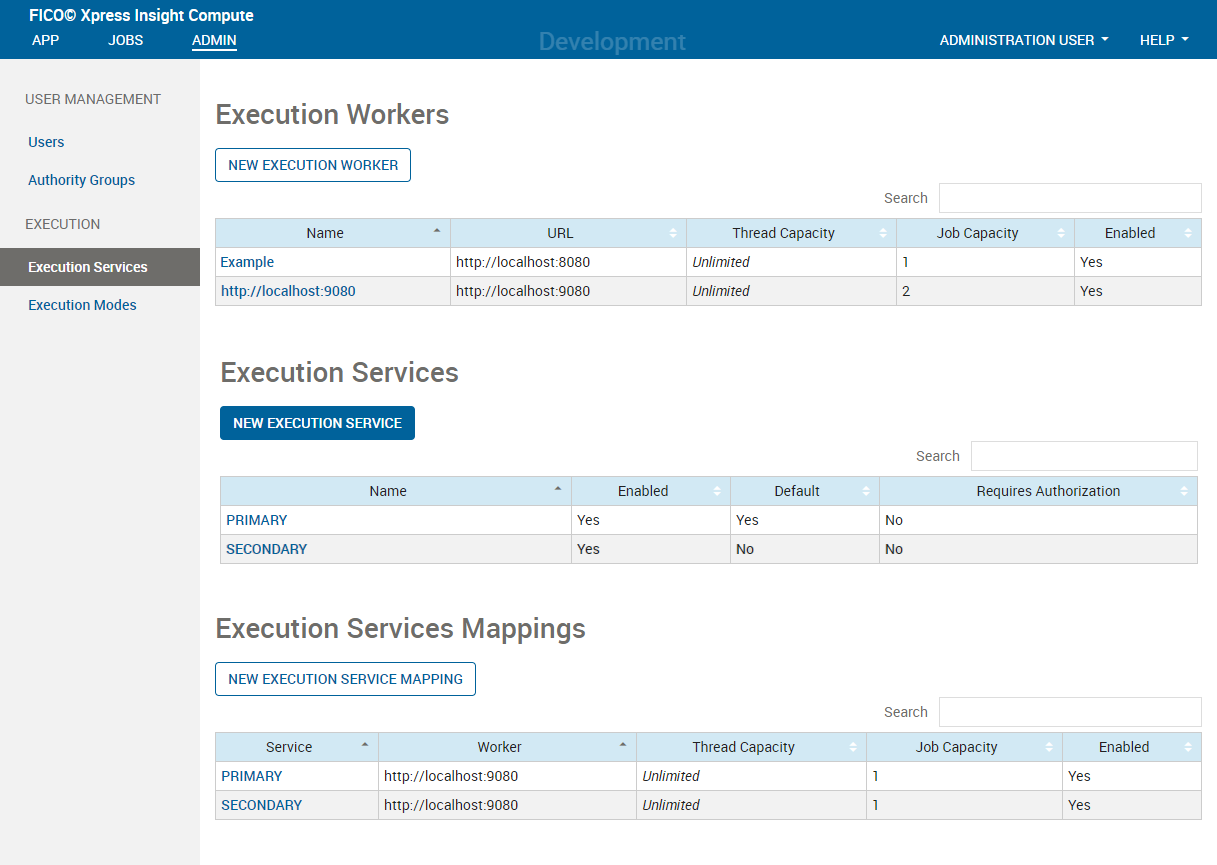
Two default execution services called PRIMARY and SECONDARY are configured on initial installation. Developers might choose to route longer jobs to PRIMARY and short duration jobs to SECONDARY as a way to improve throughput and avoid blocking.