In this example, we have used Okta as the IdP. The process should be similar for all IdP providers.
You need to have access to the admin pages of your IdP.
The example shows the
Okta
Classic UI.
- Log in to the administration interface of your instance of Okta.
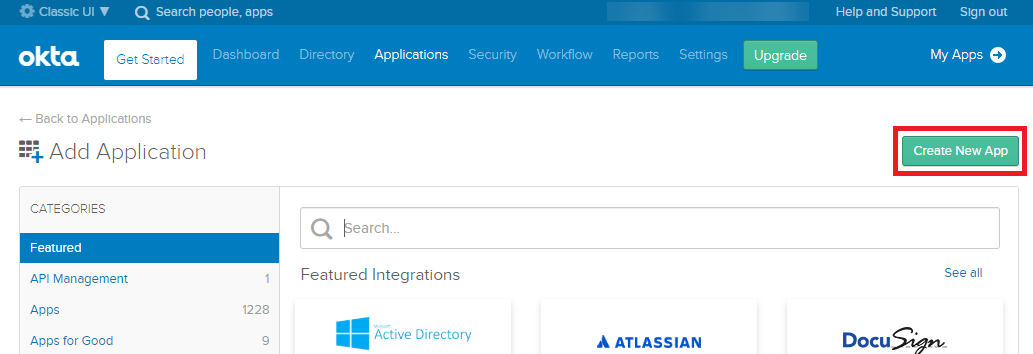
- Select Applications.
- Click Add Application.
- Click Create New App.
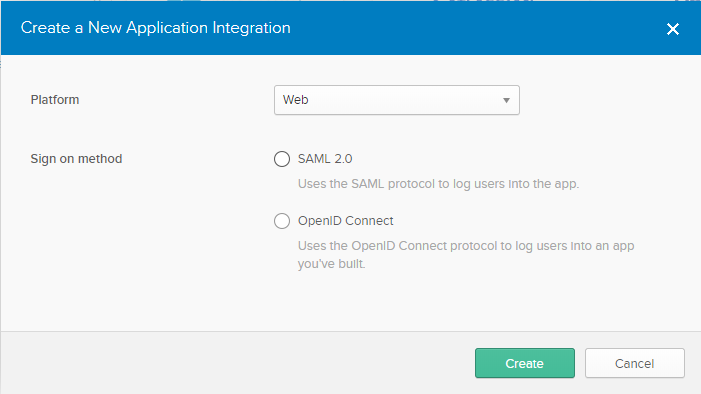
- In the Create New Application Integration window, select the following:
- Platform - Web
- Sign on Method - SAML 2.0
- Click Create to open the Create SAML Integration wizard.
- In the General Settings pane, enter:
- App Name - Enter the name you want displayed on the tile for this application in your Okta dashboard.
- Optionally, upload an App logo.
- Configure the App visibility settings.
- Click Next.
- In the Configure SAML pane, edit the fields shown below with the settings for your Insight server, where <hostname> is the root URL of your Insight server.
- In the GENERAL section:
| Field |
Value |
| Single sign on URL |
https://<hostname>/login/saml2/sso/default |
| Audience URI (SP Entity ID) |
https://<hostname>/saml2/service-provider-metadata/default |
- In the ATTRIBUTE STATEMENTS (OPTIONAL) section, use the Add Another button to create the attributes required, then enter or select the following:
| Name |
Name format (optional) |
Value select from options in drop down list |
| givenName |
Basic |
user.firstName |
| sn |
Basic |
user.lastName |
| mail |
Basic |
user.email |
| superuser * |
Basic |
isMemberOfGroupName("<Xpress Insight administrator group name>") |
* The superuser attribute should use the Okta Expression Language to derive whether a user is a superuser; The example above returns true if the user is a member of a specific group. This attribute should be assigned to the Xpress Insight 5 system administrator to provide access to all authority groups.
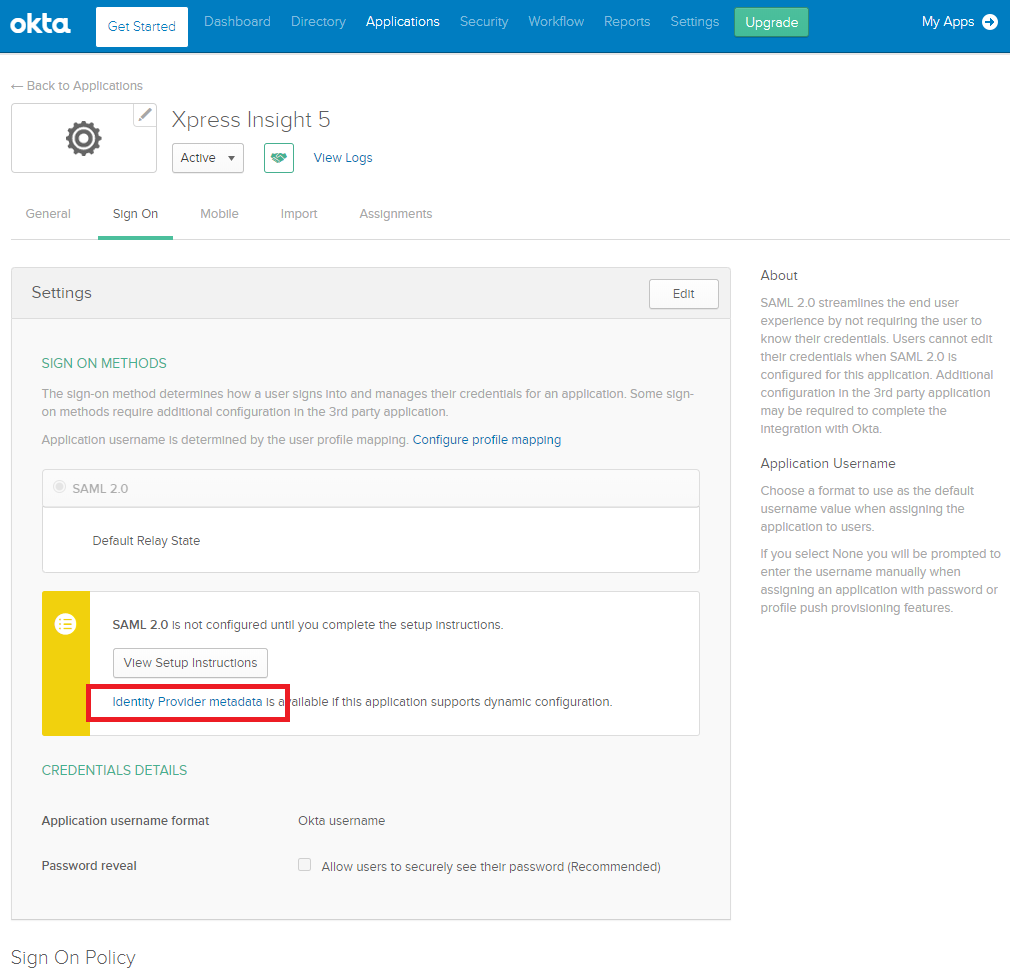
- Click Finish. The settings for your configured app are displayed.
- All of the settings required by Xpress Insight to integrate with Okta are contained in the Identity Provider metadata file, named saml2-idp-metadata.xml. Click the link highlighted in the image above to download and save the file.
The
Identity Provider metadata file created in this section is used to provide Insight with the location of the IdP. The file also contains the IdP certificate that allows
Xpress Insight to verify the SAML response originated from the IdP. The next section instructs you how to add this file to
Xpress Insight.
"Okta" means Okta, Inc., and its affiliates and subsidiaries as may be applicable
© 2001-2024 Fair Isaac Corporation. All rights reserved. This documentation is the
property of Fair Isaac Corporation (“FICO”). Receipt or possession of this documentation does not
convey rights to disclose, reproduce, make derivative works, use, or allow others to use it except
solely for internal evaluation purposes to determine whether to purchase a license to the software
described in this documentation, or as otherwise set forth in a written software license agreement
between you and FICO (or a FICO affiliate). Use of this documentation and the software described in
it must conform strictly to the foregoing permitted uses, and no other use is permitted.