
Adding and Manipulating Decision Table Columns and Rows
Adding and Manipulating Decision Table Columns
- Simple columns: whereby a match is checked by comparing the input value to the corresponding value in the table. This simple type can contain strings or numbers.
- Range columns: where a match is checked by comparing the input value to a range defined in the table. Range columns can also be used to display the data by series, and to provide a filter.
Columns and their values are managed in the Column Manager, launched by clicking OPEN COLUMN MANAGER in the decision table editor. Columns can be dragged in the Decision Table Editor after they have been added to re-order them.
- To add a simple input column, type a suitable name in the first empty Header field, select SIMPLE in the Type drop-down list and click ADD in the last column.
Wildcard values are not plotted, and so can be used to hide rows.
- To add a range column, type a suitable name in the first empty Header field, select RANGE in the Type drop-down list, select an item in the Operator drop-down list and click ADD in the last column. The lower and upper bounds of range keys are added as later edits to table rows. The Operator field can be set to one of four values:
< .. <= The range does not include its lower bound but includes its upper bound. <= .. < The range includes its lower bound but does not include its upper bound. < .. < The range does not include either its lower bound or its upper bound. <= .. <= The range includes both its lower bound and its upper bound.
[operator][space]..[space][operator]. This is especially important to bear in mind if you decide to edit a decision table in a text editor as a CSV file. For more, see
Editing Decision Tables as CSV files.
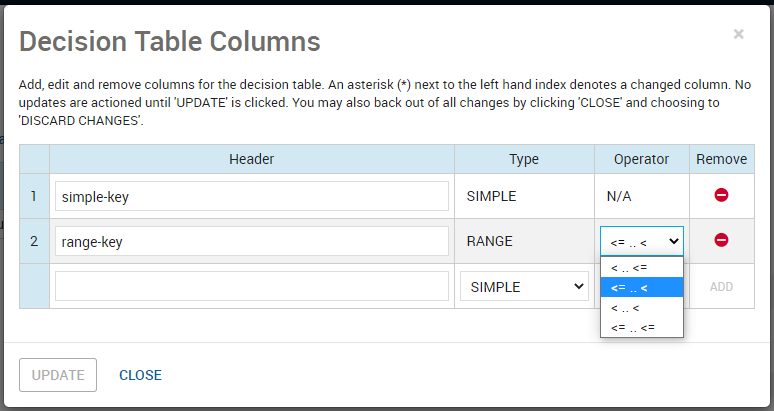
Column Manager edits that have not been saved are denoted by an asterisk (*) following the column ids in the first column. Click UPDATE to save them. Click CLOSE to dismiss the Column Manager—a warning appears if you have unsaved changes.
Adding and Manipulating Decision Table Rows
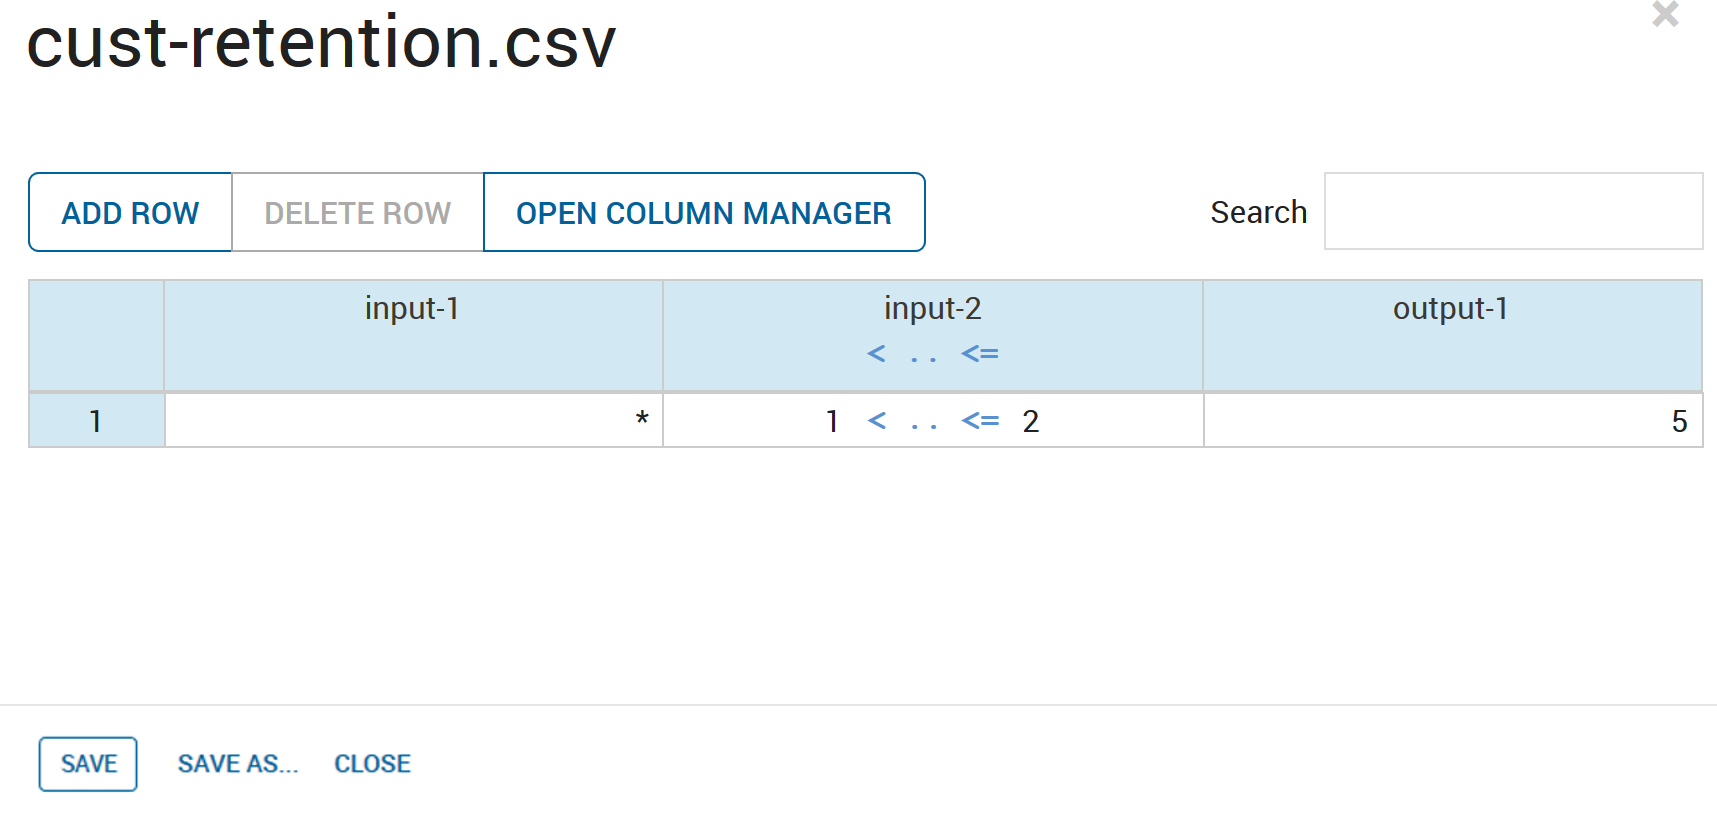
- To add a row to a decision table, click ADD ROW.
- To set values for simple columns, replace the asterisks(*) with specific values.
- To set the bounds of range columns, replace the asterisks(*) in the relevant cells with the bounding values.
The figure shows the result of configuring a decision table to emit an output-1 value of 5 if it receives an input-2 value above 1 and less than or equal to 2. Note the asterisk(*) in the input-1 cell-this is a wildcard and for this row, means that the logic permits any value of input-1.
- You can copy and paste table data and undo changes.
- Click SAVE and then CLOSE to dismiss the dialog.
© 2001-2024 Fair Isaac Corporation. All rights reserved. This documentation is the property of Fair Isaac Corporation (“FICO”). Receipt or possession of this documentation does not convey rights to disclose, reproduce, make derivative works, use, or allow others to use it except solely for internal evaluation purposes to determine whether to purchase a license to the software described in this documentation, or as otherwise set forth in a written software license agreement between you and FICO (or a FICO affiliate). Use of this documentation and the software described in it must conform strictly to the foregoing permitted uses, and no other use is permitted.