In the Xpress WorkbenchHOME page, click CREATE PROJECT, enter a value of Portfolio Optimization in the Name field in the subsequent Create Project dialog and then click SAVE.
A new tile called
Portfolio Optimization appears in the Xpress Workbench
HOME page.
Note: Depending upon your installation, you may see an existing project tile labeled
Portfolio - An Optimization Model Example on the
Xpress WorkbenchHOME page. This is a more advanced portfolio optimization model provided as an example, and is unrelated to the new
Portfolio Optimization project just created.
Click on the Portfolio Optimization tile.
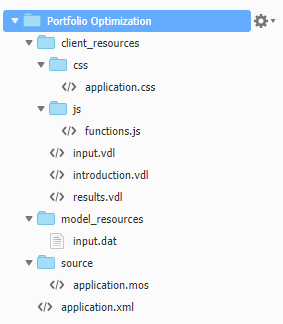
Xpress Workbench launches your new project in which it has created a template application structure. Examine the contents of the vertical Project tab:
A New
Xpress Workbench Project
This arrangement of new files and folders is designed to help you start quickly with a new
Xpress Insight app.
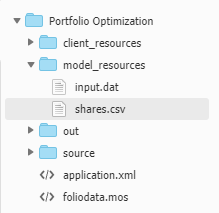
In the File menu, choose Upload Local Files and follow the prompts to upload your prepared files—foliodata.mos and shares.csv—to the Portfolio Optimization folder.
The project structure now appears as:
Uploaded Model Source and Data Files
In the Run menu, choose Run foliodata.mos and wait a few moments.
The model compiles and runs.
Note: Depending on the settings of your
Xpress Workbench environment, some other files may also appear at this stage. For the purposes of this tutorial, they can safely be ignored.
Review the contents of the debugger pane below the code window.
It contains:
Compiling foliodata.mos to out\foliodata.bim with -g
Running model
Loading data.
Loading finished.
Starting optimization.
Expected total return    14.09
Total high risk shares    0.33
Total North-American      0.45
Largest position          0.25
Optimization finished.
Process exited with code: 0
This reveals that the maximum achievable ROI is 14.09, respecting the business constraints.

 Note: Depending upon your installation, you may see an existing project tile labeled Portfolio - An Optimization Model Example on the Xpress Workbench HOME page. This is a more advanced portfolio optimization model provided as an example, and is unrelated to the new Portfolio Optimization project just created.