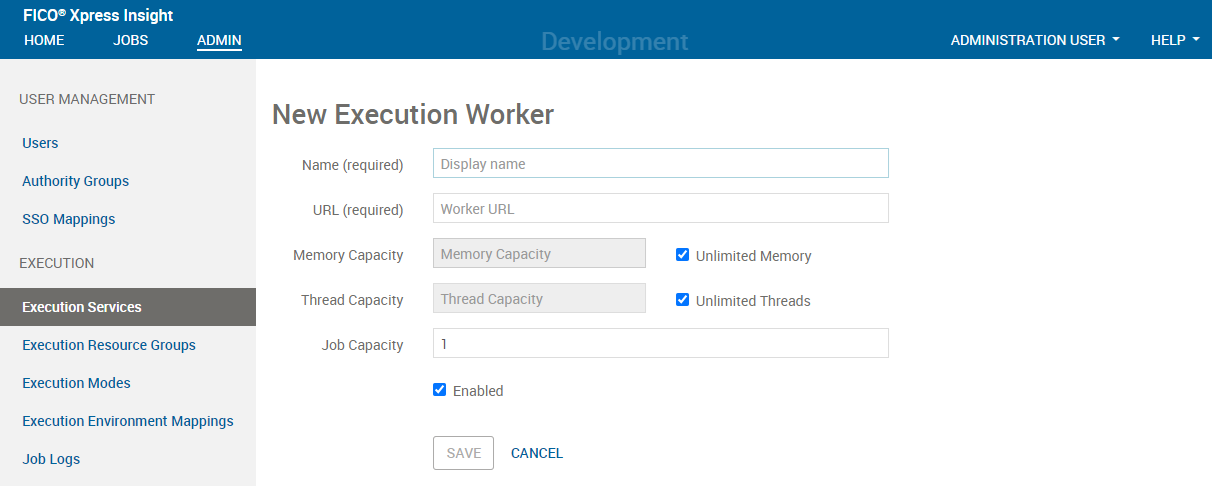
In the Execution Workers section of the Execution Services admin page, click New Execution Worker.
The New Execution Worker window opens.
Complete the following fields:
Name (required): An alias for the worker to serve as a brief identifier, such as localhost.
URL (required): URL of the worker, as in these examples:
http://localhost:9080
https://192.168.3.4:9443
https://xpress-insight-worker.example.com
Memory Capacity: The maximum amount of memory available to allocate to Xpress Insight jobs, expressed in mebibytes (Mi) or gibibytes (Gi). Specify an integer followed by Mi or Gi (for example, 4Gi or 256Mi).
This field is disabled if Unlimited Memory is selected.
Important: Remember that some memory is consumed by the worker itself, the operating system, and any other applications or services that might be running. Therefore, the memory capacity you specify for a worker should always be less than the total memory installed in the machine.
Unlimited Memory: Select this option to disable the memory capacity restriction.
Thread Capacity: The maximum number of threads available to allocate to Xpress Insight jobs.
This field is disabled if Unlimited Threads is selected.
Unlimited Threads: Select this option to disable the thread capacity restriction.
Job Capacity (required): This denotes the maximum number of concurrent jobs that the worker can execute concurrently.
Enabled: Uncheck the Enabled checkbox if you do not want the Xpress Insight server to send jobs to this worker.
Note: Memory settings are read-only on FICO Analytic Cloud. The memory capacity of a worker is automatically calculated based on the total memory capacity of the machine.
Click SAVE when finished.
At any time, you can edit the worker details by clicking on the worker in the Name column of the Execution Workers section.