
Opening the Attachments Dialog Box
| Column Name | Description |
|---|---|
| Select | Check boxes used to download or delete files. |
| Attachment Name | The name of the file. The name of the attachment is a link as well that opens a dialog box for entering or editing a brief description and assigning tags if they are available for the app. It also provides metadata for the file including file size and the information from this table. The first line of the description shows in the Attachment Name field. |
| Tags | With the Assign tags link, you can assign one or more app-developer-defined tags to an attachment. Tags are assigned to files so that the system can use files based on their tags rather than requiring the actual filenames. If tags are already assigned to an attachment, they are listed in the table, and you can click a tag to open the attachment dialog box and add or remove tags. |
| Modified | Date the file was uploaded or modified. |
| By | The user name of the person who uploaded or modified the file. |
| Actions | Click the Download  icon to download a single file. If available, click the Select Editor icon icon to download a single file. If available, click the Select Editor icon  to choose an editor with which to edit the attachment. If only one editor is available, the attachment is opened immediately. to choose an editor with which to edit the attachment. If only one editor is available, the attachment is opened immediately. |
The system can also assign attachments to a scenario, and they can be hidden so that you do not have to view them unless you choose to. A view  icon indicates if hidden files are available for view. If the icon is enabled and you click it, the hidden files show. Click the icon again to hide the file. The app developer determines which files are hidden. For example if the system generates multiple log files, you may not them to show unless you need to review one.
Complete the following steps to open the App Attachments or Scenario Attachments dialog box and view the uploaded attachments.
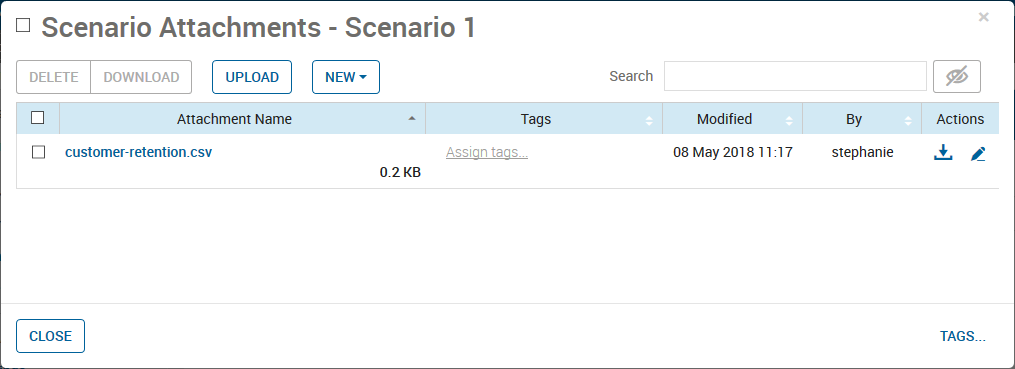
Sample Scenario Attachments Dialog Box
- Complete one of the following actions to open the view attachments.
- Open the App Attachments dialog box.
- Click the Action Menu
 icon.
icon. - Click App Attachments.
- Click the Action Menu
- Open a Scenario Attachments dialog box.
- For a scenario on the shelf:
- Click the Open Menu
 icon.
icon. - Click Attachments.
- Click the Open Menu
- For a scenario that is not on the shelf:
- Click the shelf to bring up the Scenario Explorer.
- Mouse over the scenario to which you want to attach a file, and select the Actions icon.
- Click Attachments.
- For a scenario on the shelf:
The App Attachment or Scenario Attachments dialog box opens, showing the file name, assigned tags, and when it was added or modified, and who modified it. - Open the App Attachments dialog box.
© 2001-2020 Fair Isaac Corporation. All rights reserved. This documentation is the property of Fair Isaac Corporation (“FICO”). Receipt or possession of this documentation does not convey rights to disclose, reproduce, make derivative works, use, or allow others to use it except solely for internal evaluation purposes to determine whether to purchase a license to the software described in this documentation, or as otherwise set forth in a written software license agreement between you and FICO (or a FICO affiliate). Use of this documentation and the software described in it must conform strictly to the foregoing permitted uses, and no other use is permitted.